

Test Garment Shrinkage Before Production: 2026 Guide
Learn how to test garment shrinkage before production. Calculate shrinkage percentage, meet fabric shrinkage testing standards, and protect quality. Start.
Learn how to test garment shrinkage before production. Calculate shrinkage percentage, meet fabric shrinkage testing standards, and protect quality. Start.

Last Updated: September 27, 2026
Testing garment shrinkage before production is the cheapest insurance a clothing brand can buy. A failed swatch test costs a few hours; skipping it costs a production run.
Fabric shrinkage happens when fibres relax and return to their natural state after being stretched during manufacturing. Dimensional stability is a fabric's ability to hold its size through washing, drying, and wear.
Natural fibres absorb water and swell. Cotton stretches during weaving and spinning, then contracts when washed. Wool shrinks more dramatically with heat and agitation.
Washing machines agitate fabric, pulling fibres and causing felting, especially in wool. Higher spin speeds and hotter water make it worse.
The two standards you'll see most often are AATCC 135 and ISO 6330. Both set out how to wash, dry, and measure a swatch so results are comparable across suppliers and lots.
| Standard | Region Focus | What It Covers | Typical Use |
|---|---|---|---|
| AATCC 135 | US and global suppliers | Dimensional change after home laundering | Cotton and blended knits |
| ISO 6330 | International | Domestic wash and dry procedures | Broad textile testing |
| AS 2001.5.4 | Australia | Dimensional change in laundering | Local compliance reference |
Here's the full process, start to finish, a day or two once you have your swatch and a controlled wash setup.
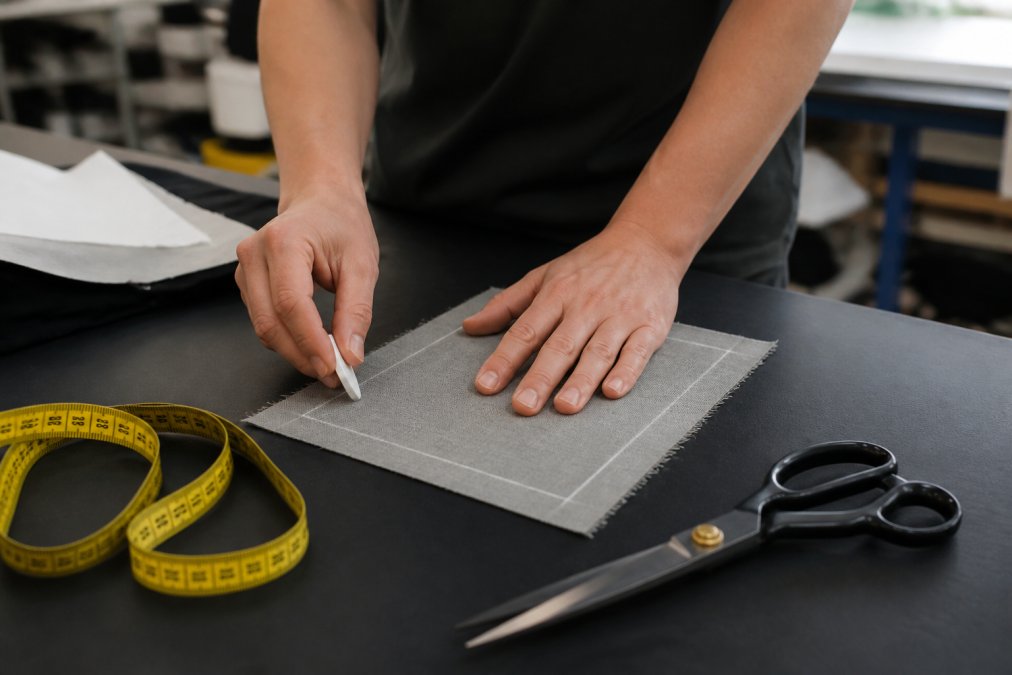
Cut a square swatch from the same fabric lot you plan to use in bulk production, around 50cm by 50cm is easy to measure.
Run the swatch through your chosen wash and dry cycle, following your standard's laundering conditions: water temperature, cycle type, detergent, and drying method.
The formula: subtract the final measurement from the original, divide by the original, multiply by 100.
Here's a worked example:
This is the part most guides skip. Testing gives you the shrinkage number; pattern making is where you use it. Get it wrong and you've paid for a test you didn't act on.
Say your test returned 5% warp and 2% weft shrinkage, with a finished body length target of 72cm and a 56cm chest width (half-measurement 28cm).
Not every seam gets the same treatment. Rules of thumb most pattern makers work to:
Once patterns are adjusted, your marker (cutting layout) needs re-nesting. Longer panels mean more fabric per garment, so recalculate yield before committing to a bulk order, a 5% length addition on a long-sleeve tee can push you into the next fabric width bracket.
Two checks before you cut:
Compensation is what you build into the pattern; tolerance is what you accept as pass/fail on the finished garment. They're not the same number, and confusing them is a common error.
If the compensation needed to hit your target size distorts the silhouette, say, a 10% length addition on a fitted jacket, the fabric is wrong for that style. Pre-shrink it before cutting, switch to a more dimensionally stable blend, or redesign around the shrinkage. Testing early gives you room to make that call before the fabric is cut.
Different fabrics fail in different ways, and a failed test usually points to a specific cause. Knowing the mechanism tells you whether to adjust the pattern, change the wash cycle, or reject the fabric.
Cotton and cotton-heavy knits. Cotton fibres swell with water and relax back toward their natural length after the tension of spinning and knitting is released. Most movement happens on the first wash. A typical untreated cotton jersey might show 5-8% warp shrinkage on the first wash and 1-2% on the second, a single-wash test is standard, but a two-wash test shows where the fabric settles.
When a swatch fails, ask why first. Work through these in order:
If the fabric genuinely fails and you still want to use it, you have three options:
If a fabric passes at 30°C but fails at 40°C, your care label must reflect the conditions you tested. A garment that shrinks because the label said 40°C when you tested at 30°C is a returns problem, not a fabric problem. Match the label to the test conditions; if in doubt, test at the hotter setting and label for the cooler one.
Run through this list before approving any bulk run to keep sizing consistent across a range.
Cut a fabric swatch at least 50cm x 50cm, mark a 40cm square using tailor's chalk along the grain line, and measure both warp and weft. Wash and dry the sample using the conditions your garment will face, then re-measure. The difference between original and final measurements, divided by the original and multiplied by 100, gives your shrinkage percentage for each direction.
Most garment manufacturers work within 2% to 5% shrinkage tolerance for woven cotton and up to 7% for knit fabrics, depending on fibre content and end use. Fabric shrinkage testing standards like AATCC 135 and ISO 6330 define the wash and dry conditions, but the acceptable tolerance level is set between you and your buyer before bulk production begins.
Yes. Polyester fibres are thermoplastic and hold their shape through laundering, so a 90% cotton and 10% polyester blend will typically shrink less than 100% cotton. The cotton portion still shrinks, so you cannot skip testing, but the blended fabric usually shows lower shrinkage percentage and better dimensional stability after repeated wash cycles.
Relaxation shrinkage happens when tensions built up during spinning, knitting, or weaving release during the first wash and dry cycle. Felting shrinkage occurs in wool and other animal fibres when scales interlock under mechanical action and heat. Relaxation shrinkage is predictable and testable; felting shrinkage is harder to reverse, which is why pre-shrinking or anti-felting treatments matter for wool garments.
Shrinkage testing is unglamorous, but it's the difference between a garment that holds its shape and one that doesn't survive the first wash. At Urban Classics, we build our range around fit, fabric, and wearability, and that starts long before a garment hits the shelf. Every piece we make is cut to hold its size, from heavy oversized tees to durable swimwear, with free shipping on orders over $50. Shop now and get basics built to last.
Your cart is currently empty.
Start Shopping